Are you new to wire wrapping? Do you love all things Crystals?
Or maybe you have seen those pretty crystal hair pins around Pinterest and Etsy and wondered:
how do they get these crystals to stay on a hair pin with just wire?
Well no need to hold onto your lady buns any longer because today we are following an easy step by step tutorial on how to do just that with crystal hairpins!
Let’s get to making some magical hair accessories! Sound fun?
Supplies
I have linked the supplies below. Feel free to use what you might already have or explore other supply options.

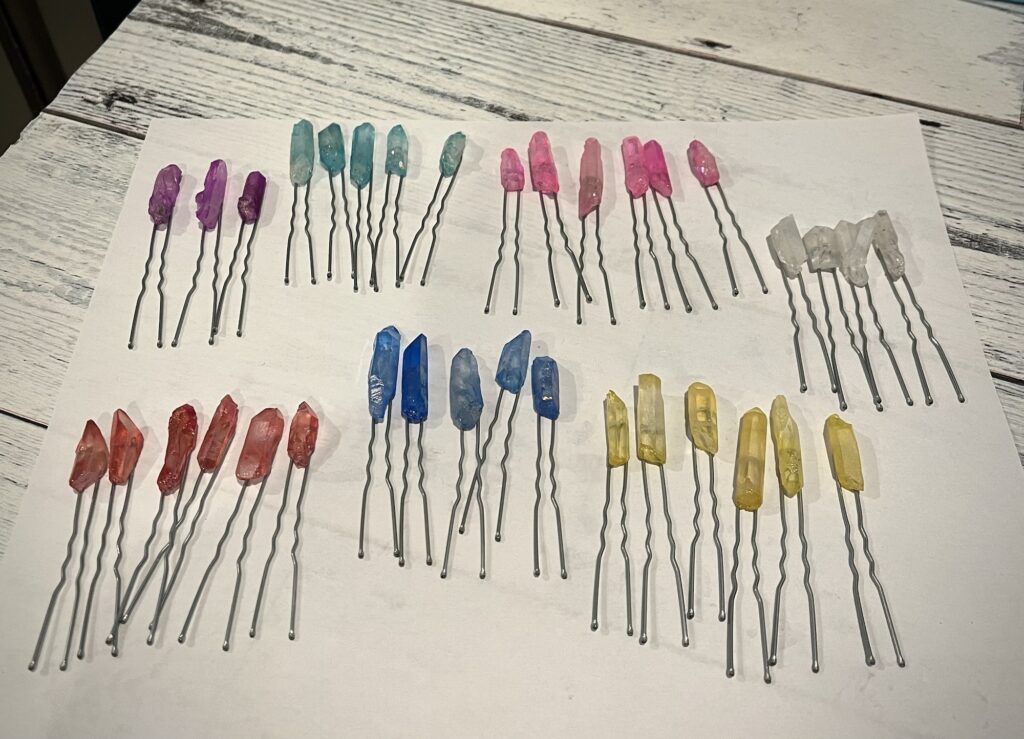
- Aura Quartz Points (with drilled holes)
- 2.4” Hair Pins (silver)
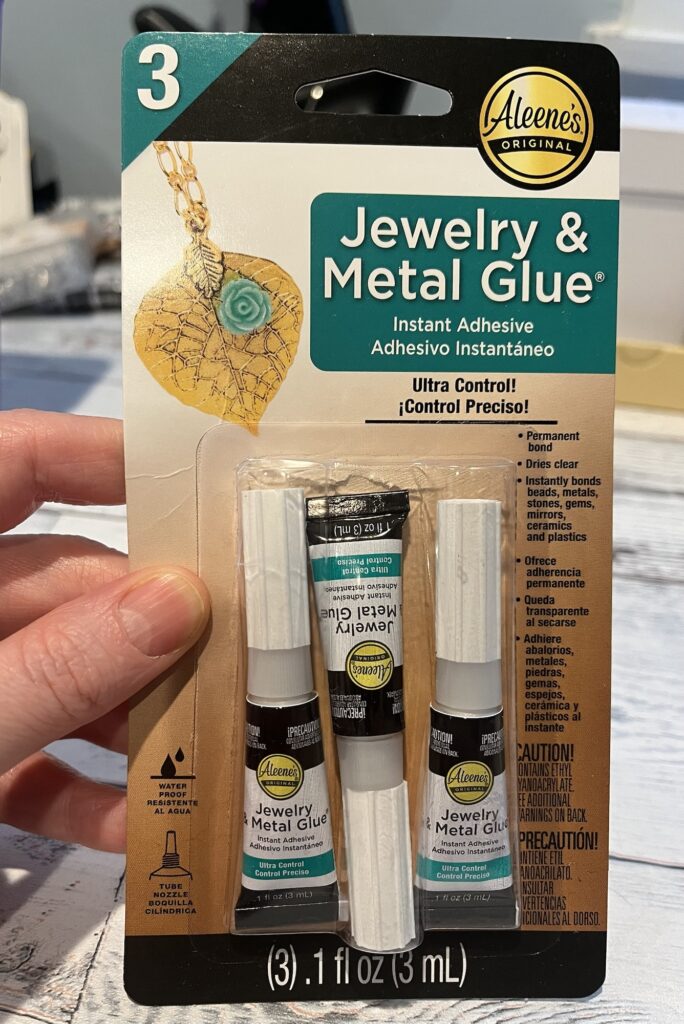
- Aleene’s Jewelry & Metal Glue
- 24 Guage Silver Coated Copper Wire
- Silicone Craft Mat (optional)
- Jewelry Pliers & Snips
Aura Quartz Points
You can purchase almost any kind of Crystal Points to make these Wire Wrapped Crystal Hair Pins. Most of what I have seen on Pinterest and Etsy are the aura quartz.
Aura quartz crystals are real and natural stones. To get their iridescent sparkle they are coated with metal and heat treated.
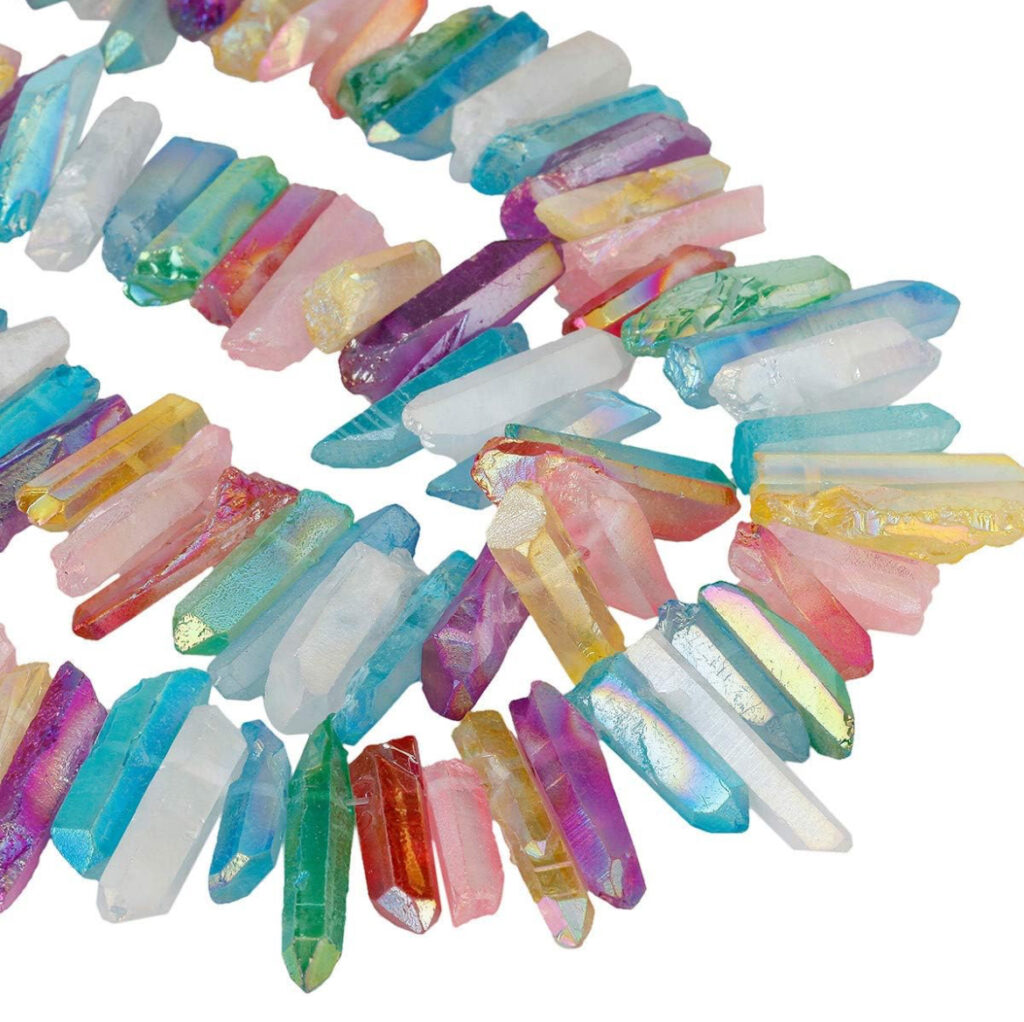
“Aura” coatings are fine metallic coating which have been vapor deposited on the crystal at a high temperature in a vacuum chamber by electrostatic charge. Some of the metals known to be used in the aura process are gold, silver, platinum and titanium.
www.rockyourworldgems.com
The quartz I have selected are titanium coated. I picked out a variety bundle of rainbow colors!
These in particular have a drilled hole in them, just like beads.
I feel this makes it a bit easier for threading the wire through the crystal to help secure it to the pin. However, it is not absolutely necessary.
Hair Pins
In a previous blog post I used 3” hair pins for Crystal Hearts which is linked here.
3” pins to 2.4” pins does not sound like a lot, right?
Let me tell you, it makes a HUGE difference!
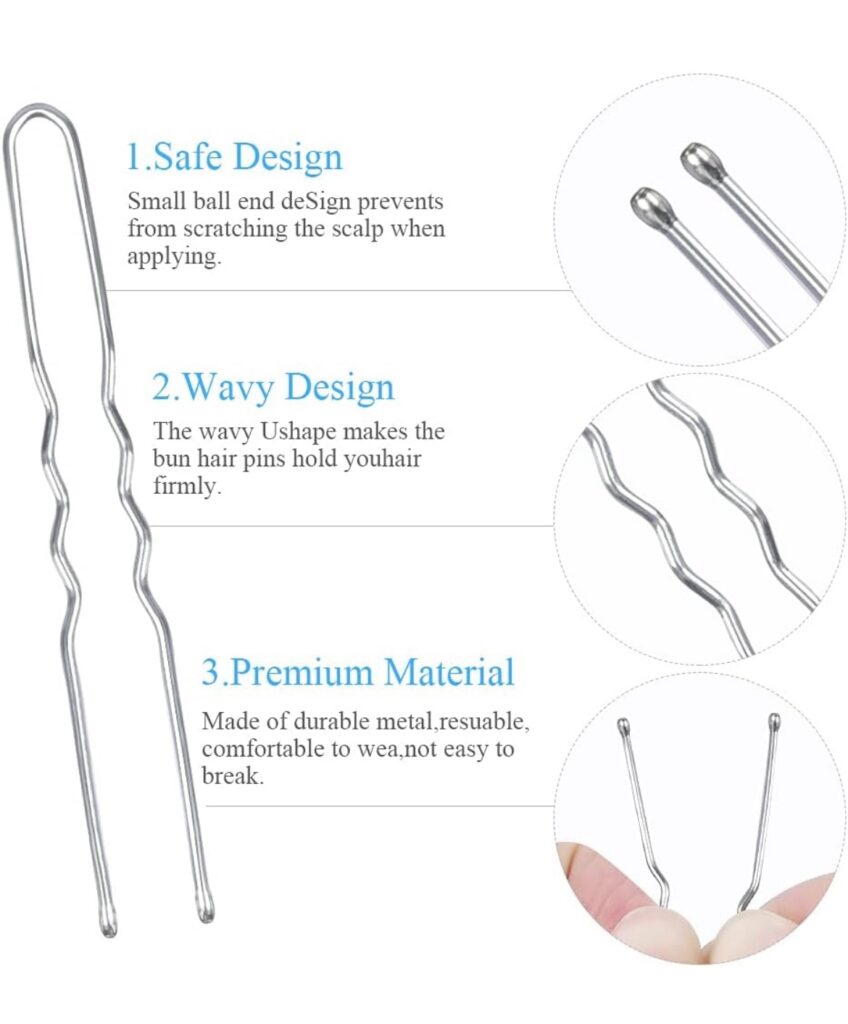
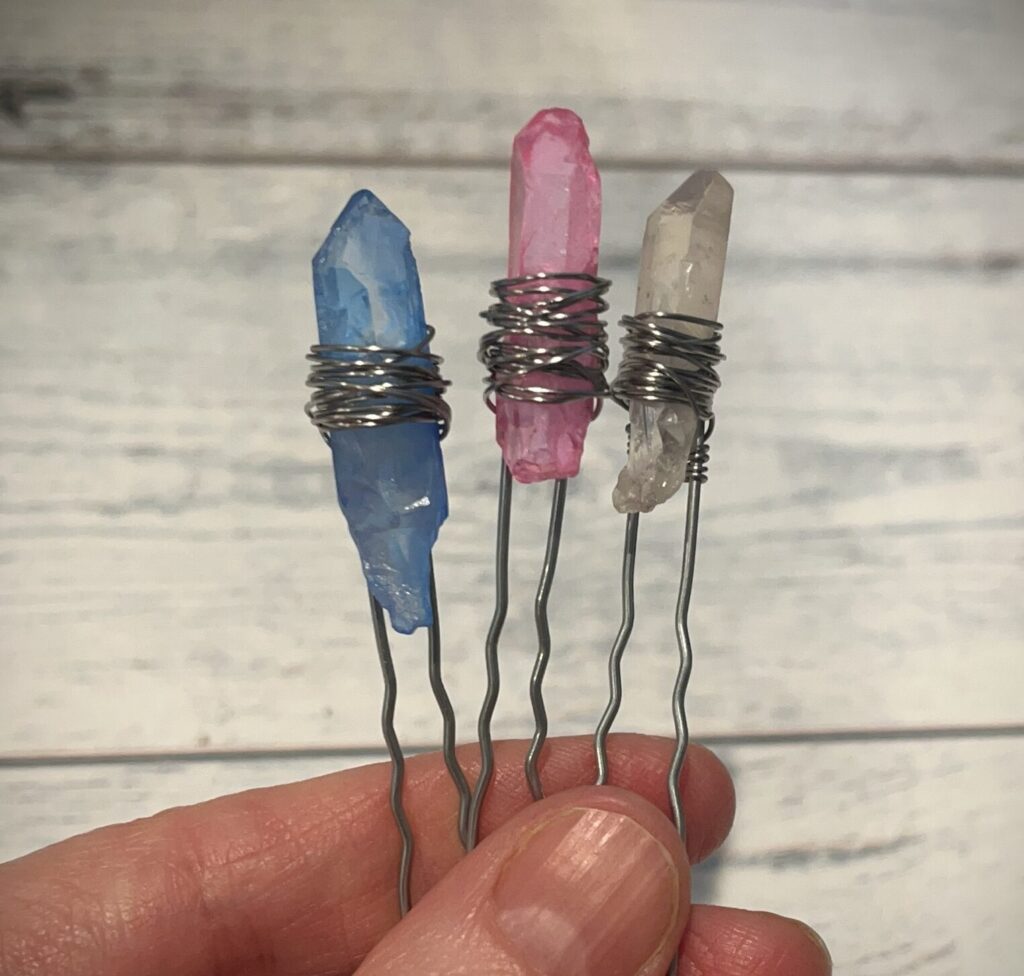
As you can see the pins we are using in this tutorial are more of a bun pin. They may add some support, but they really become a decorative accessory with the crystals added to them.
Aleene’s Jewelry & Metal Glue
I have touted many a good thing about this glue. IT. IS. A. GAME. CHANGER! 👏 While it is not really necessary for these Crystal Hair Pins, it is a big help when you wish you had 3 hands!
Copper Wire
I am by no means an expert wire wrapper, but I have learned a thing or two to pass along as I gain new knowledge and experience.
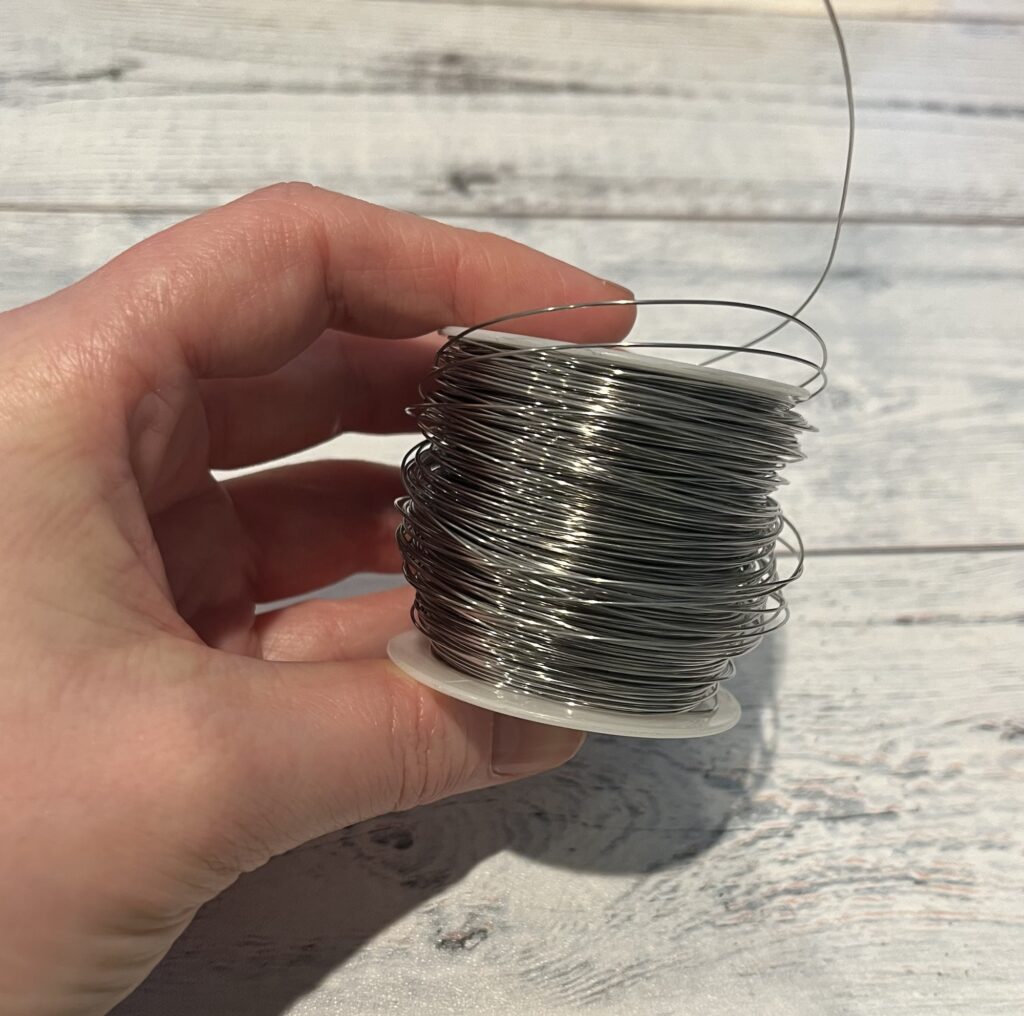
24 gauge round copper wire is the snuggle buddy for these magical rocks.
Even though this is copper wire, there are several color options available, that is because manufacturers are able to coat the copper.
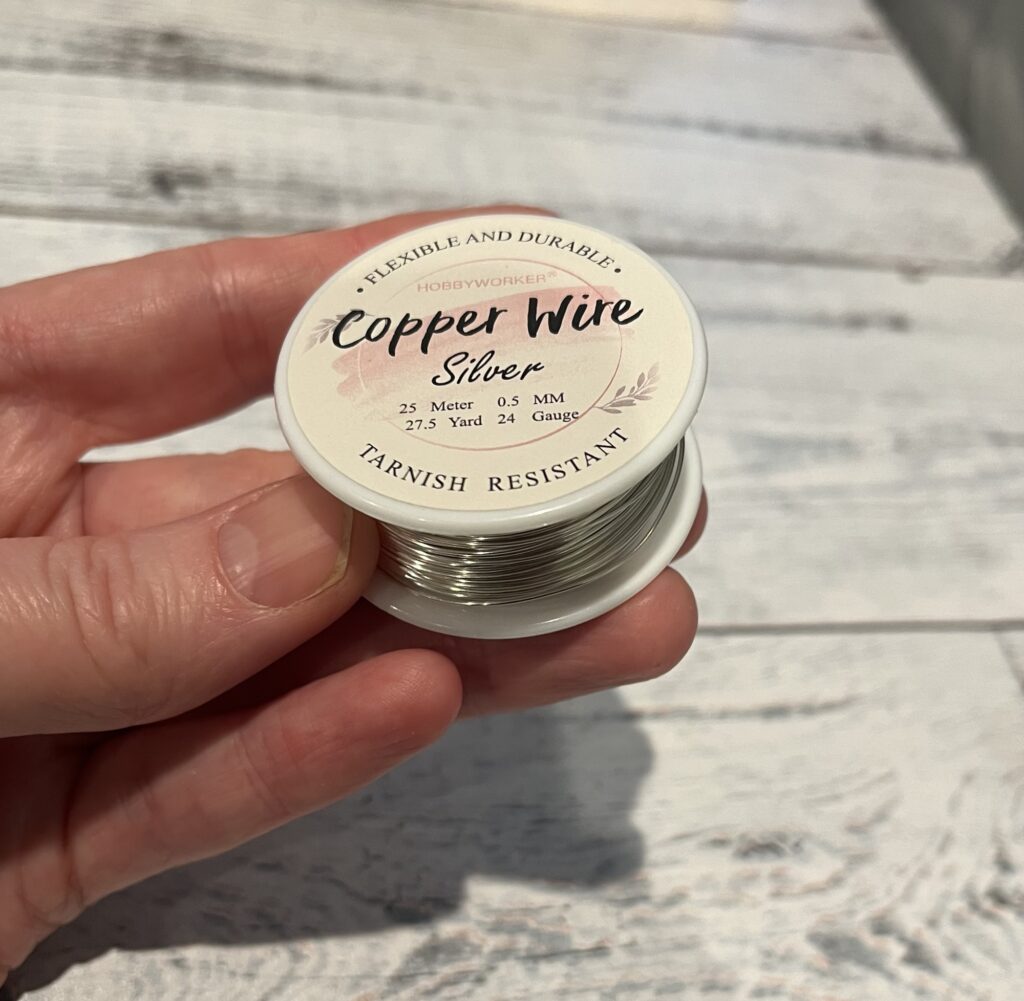
Since I have chosen to work with silver hairpins these crystal pins will be wrapped in silver coated copper wire.
Actually…
I take that back, I am advising the silver coated copper, so stick with that.
I on the other hand have so much extra sterling silver wire that I’m going to experiment 🤓
Feel free to do the same though!
Please note: Copper wire is much more pliable and forgiving, sterling silver is not, it is springy, hardy and kinda sharp! Youch!
Craft Mat
I mentioned this silicone craft mat in my crystal heart hairpins post . Well cuz I think it just makes all the sense in the world.
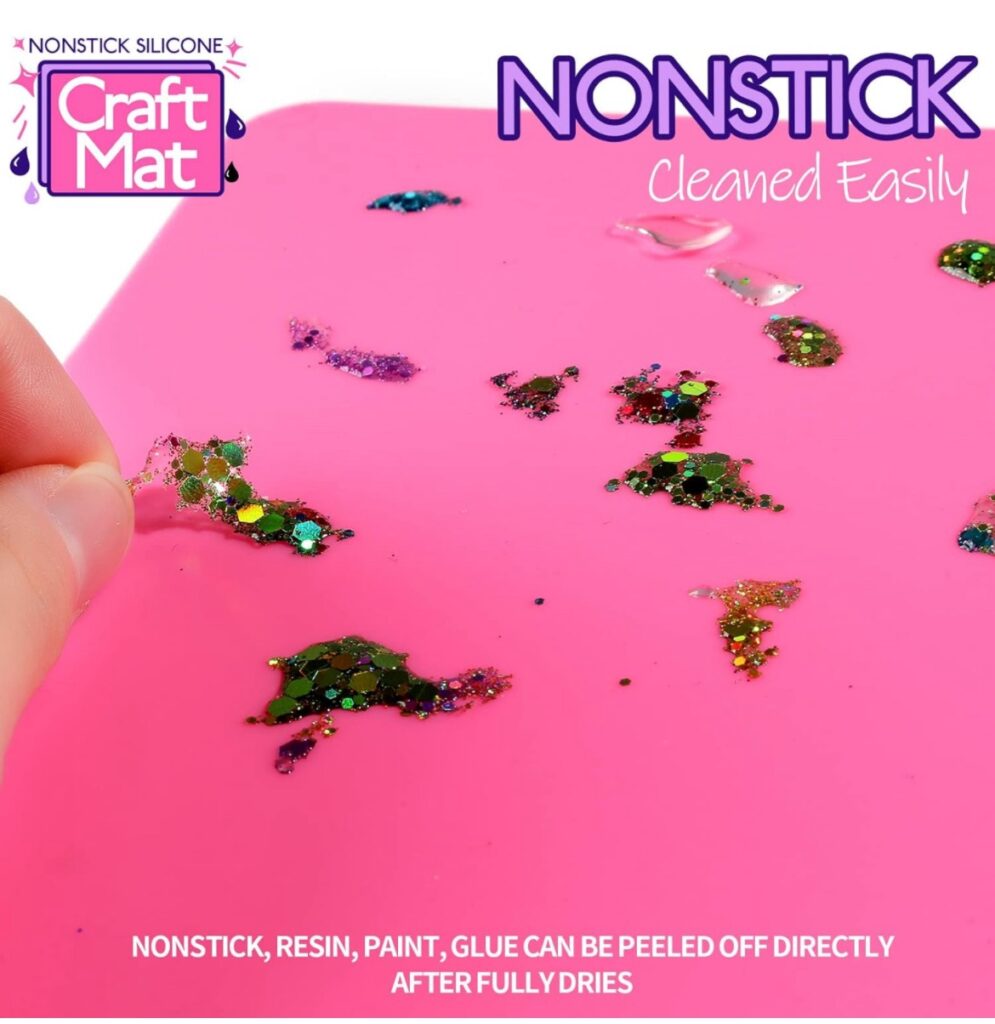
I plan on purchasing one myself, but I highly recommend when crafting to get one.
It is especially helpful for cleanup after working with any glue, paint, resin etc. ya know all the sticky fun stuff 😝
Jewelry Pliers
Jewelry pliers are essential to any wire wrap craft!
You will need:
- Jewelry Pliers
- Narrow Nose Jewelry Pliers (optional)
- Wire Snips
You’ve heard of needle nose pliers before?
Well in case you’re like me and didn’t know, there is a difference between those and jewelry pliers.
Needle nose pliers have grooves along the metal part for a better grip on whatever you might be using the tool for.
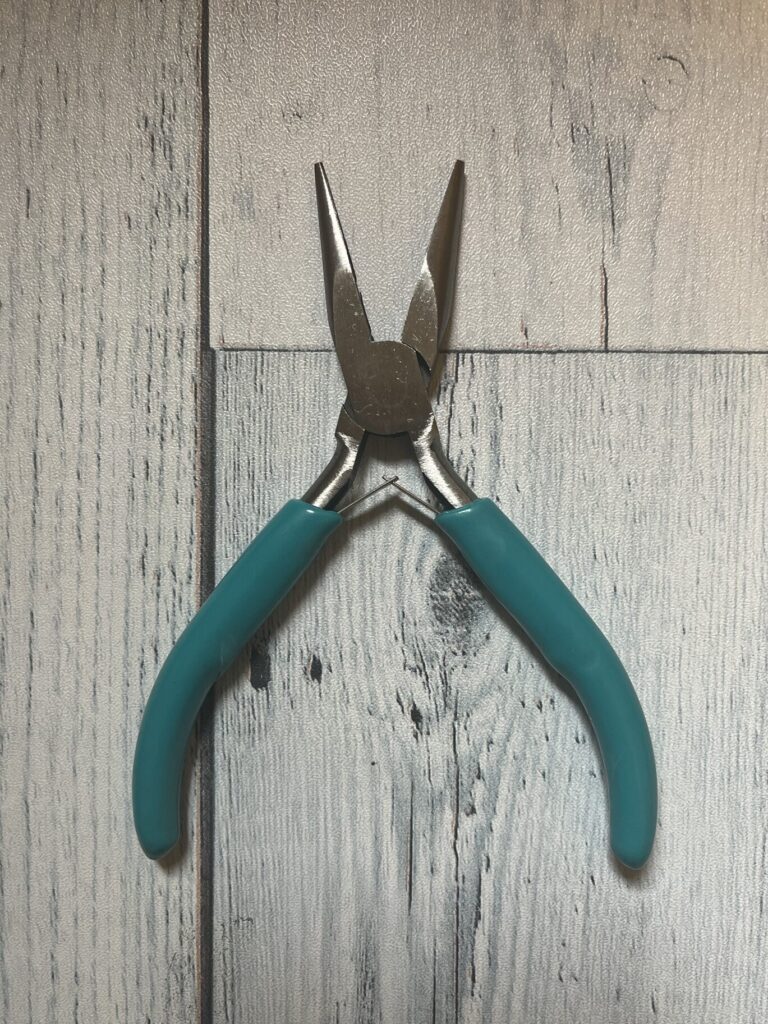
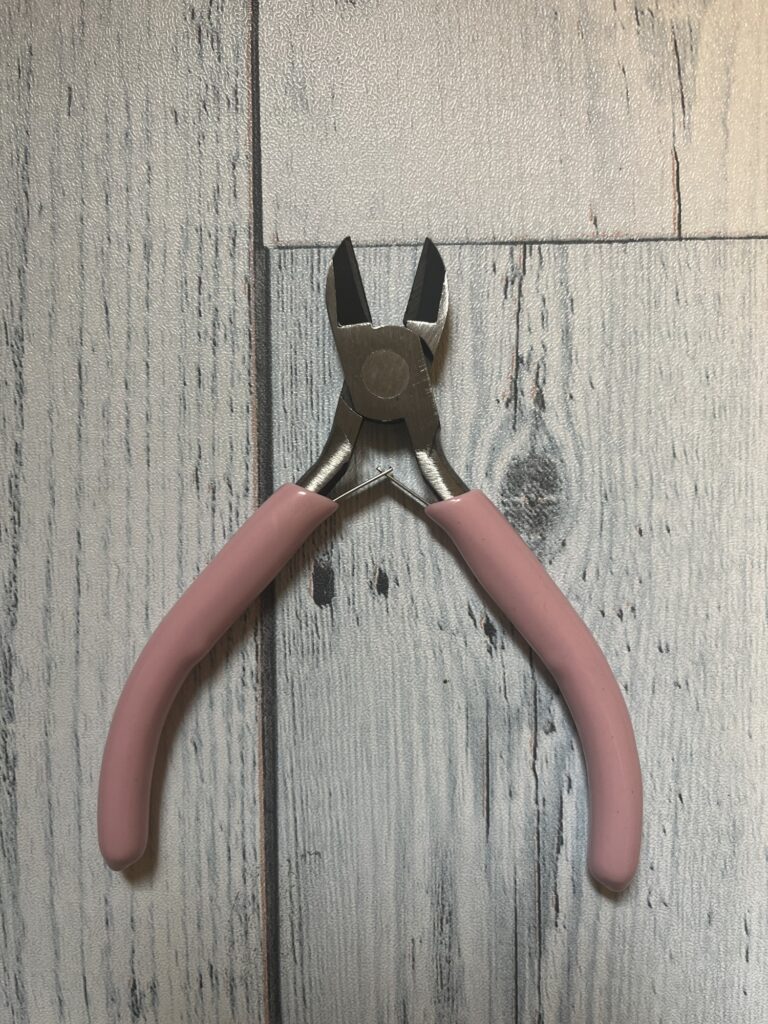
Jewelry pliers are smooth and flat. This helps prevent scratching the wire, charms, and/or gems you are working with!
Narrow nose pliers are not necessary, I just find them useful getting into smaller spaces.
Looking back I would have bought a whole set of the jewelry pliers like these here, instead of piecing my tools together one set of pliers at a time.
Tutorial
Steps 1-5
Step 1: Organize your crystals either by color or size or both. Sort through them and decide which ones you want to use.
Step 2: Count out how many hair pins you will need. Line them up on your silicone mat or surface of choice.
Step 3: Begin by placing a tiny dab of glue on the backside of the crystal. Be sure to place the glue where you want the crystal to meet the hair pin, making sure to leave the bead holes accessible.
Step 4: Line up the crystal – glue side to the hair pin. Smoosh it around on the pin, we want some of the glue to attach to it. Next, center the crystal where you want it positioned. Let it sit.
Step 5: Repeat as many times as you like!
Steps 6-11
Step 6: Let the glue dry for about an hour or two. You could leave them overnight if you want to come back to it.
Step 7: Time to wire wrap! Grab your spool of wire and pull about 12 inches. You can measure it if you like. (I did the eyeball method) Use some wire snips to cut the wire off the spool.
Step 8: Grab your first crystal hair pin and thread the wire through the bead hole about half way.
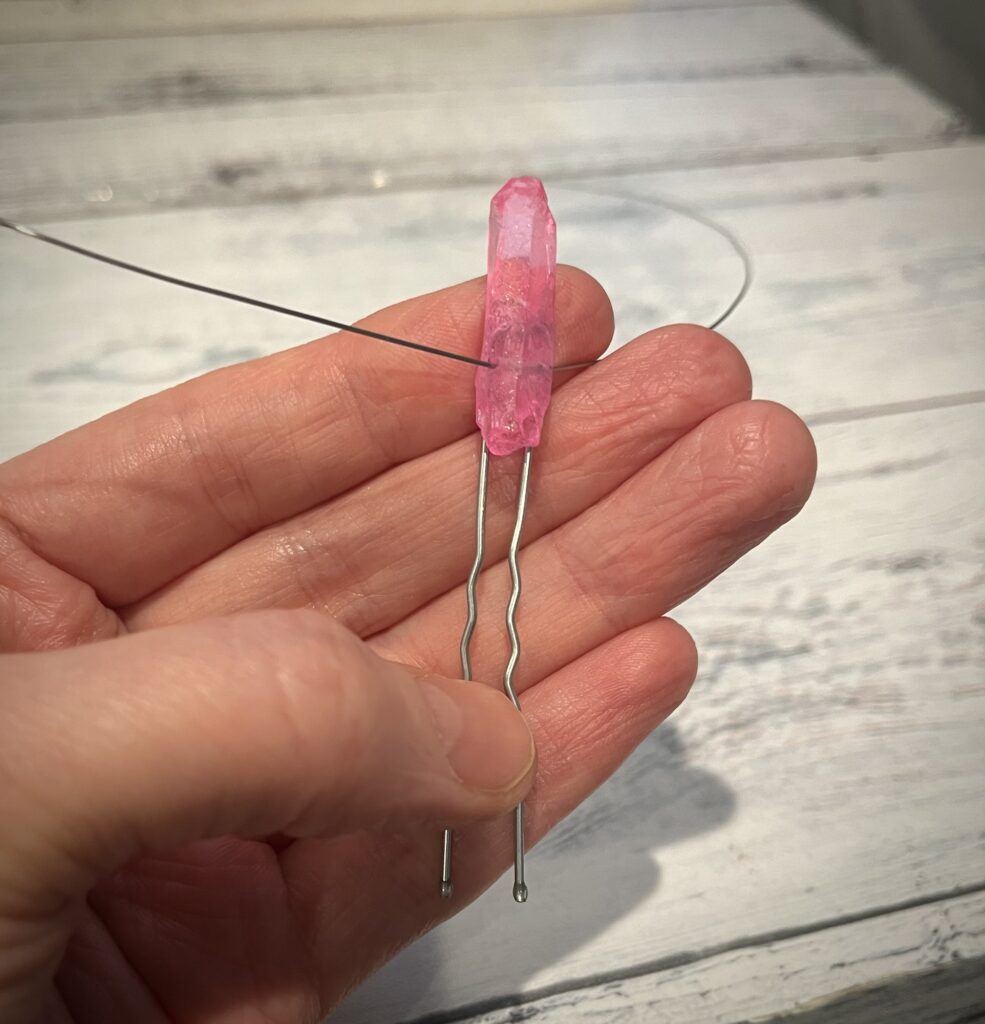
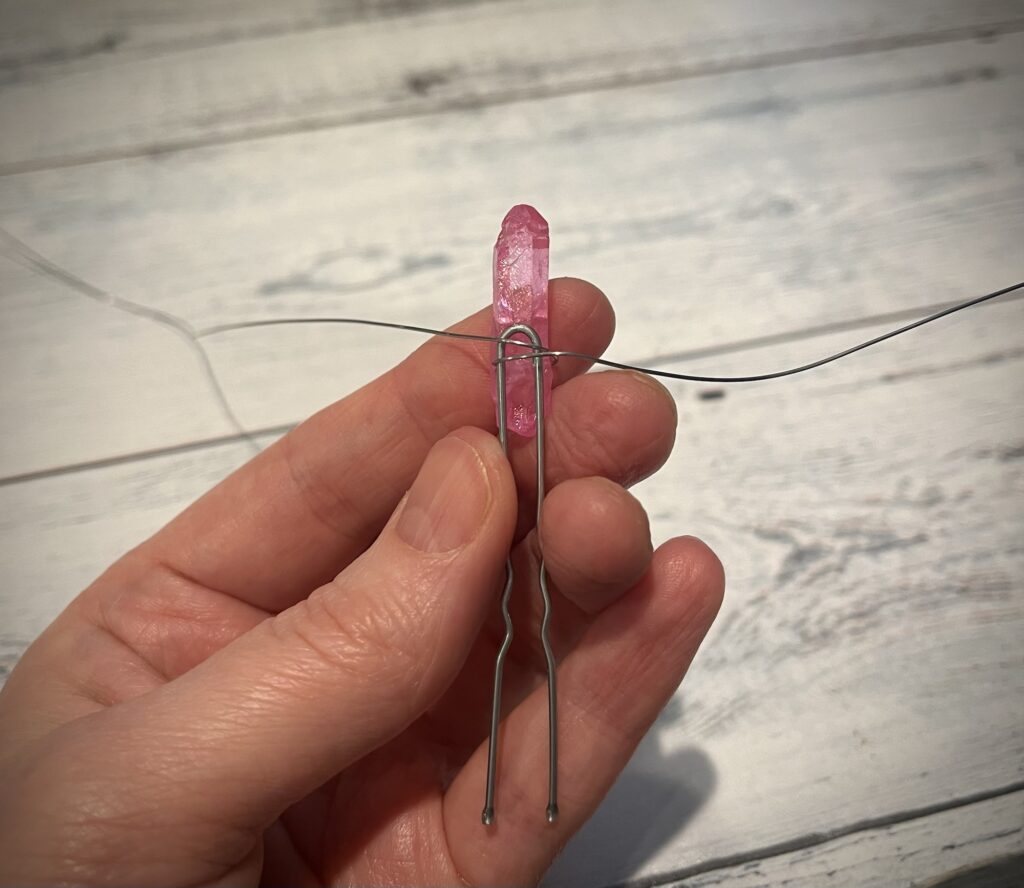
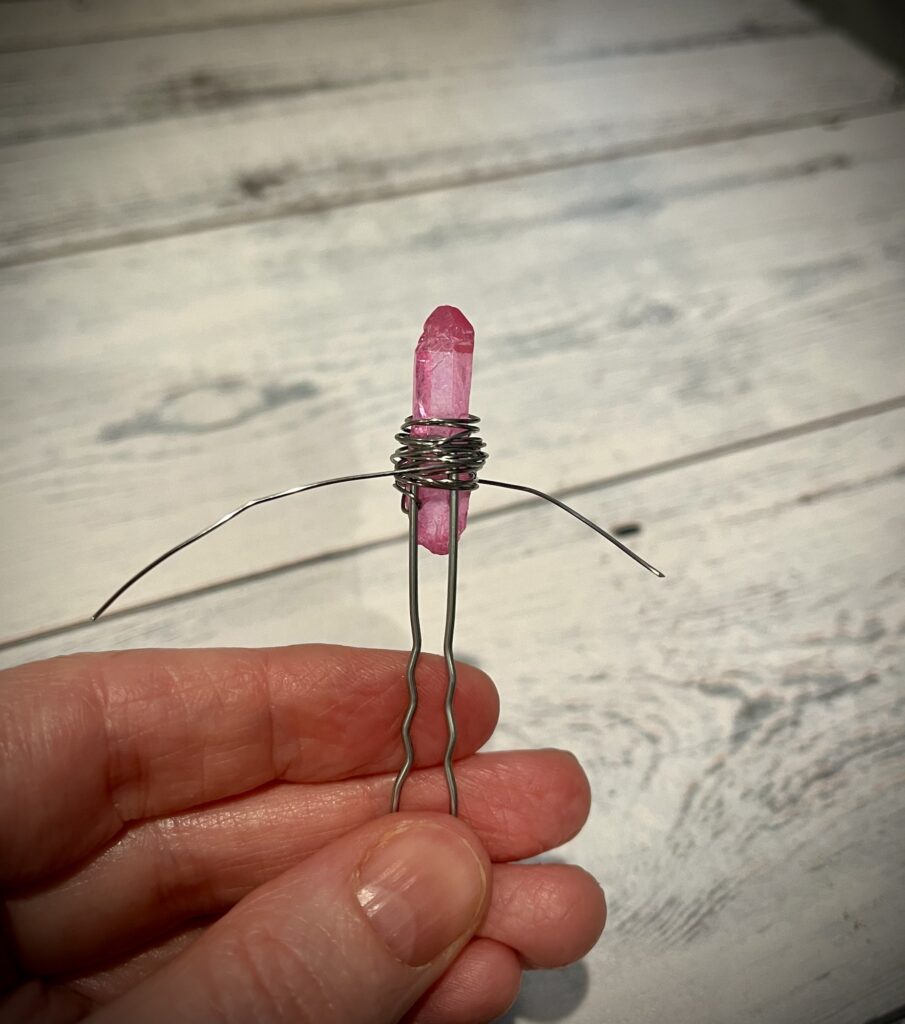
Step 9: Push the wires on each side towards the back to begin criss crossing.
As you cross them, hold the crystal tight in your hand and begin wrapping the left wire around the crystal 5 or 6 times until secure.
Step 10: Repeat on the other side. Making sure to wrap the wire tight to the crystal.
Step 11: Continue wrapping each side until there is about 2 inches left on each side.
Steps 12 – 15
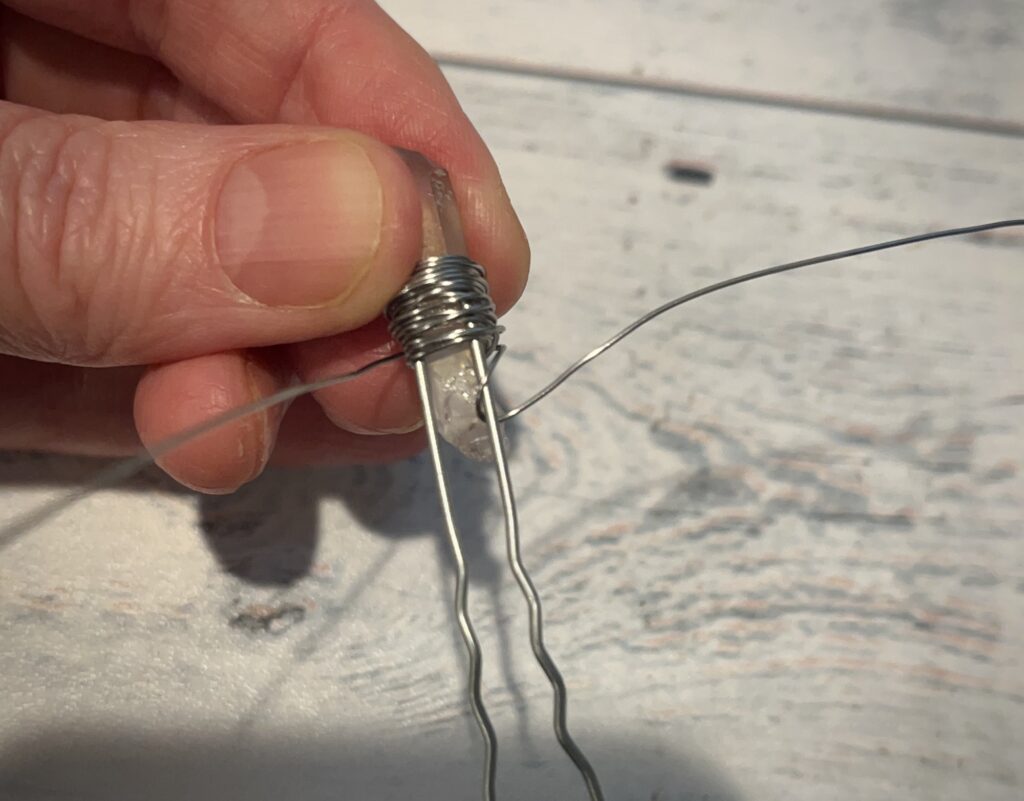
Step 12: Select a side to work with and grab the remaining wire to begin wrapping it around the hairpin only as shown.
Step 13: Wrap the wire around 3 – 4 times pulling the wire tight to the pin with the pliers after each wrap.
The wraps may have some space between them and this is where you use your pliers to squish them tight together as shown.
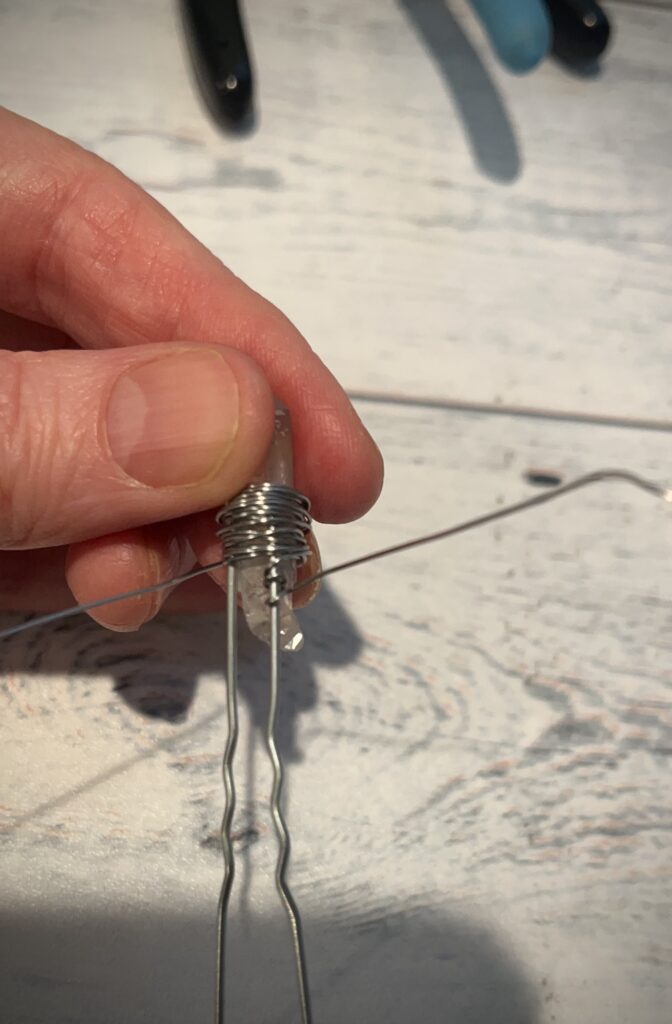

Step 14: Once the wraps are wound tight to the pin and pushed snug together. Snip the end and press the tail of the wire flat or flush with the pin so it is not poky.
Step 15: Repeat on the other side.
& There you have it!
I hope your wire wrapped crystal hairpins add more magic to your life like they have mine 💜